How to take full advantage of Google Shopping with your Magento store
Which merchant does not wish to extend its sales area? We doubt you don't care.
Online shopping, and specifically online marketplaces - such as Google Shopping - help shoppers to browse a wide range of products based on their search query without having to hop between e-commerce websites.
Google Shopping campaigns also benefit you, as retailers by:
- promoting your brand
- boosting the traffic to your website and your physical store
- bringing in more qualified leads
Google is the most used search engine in the world, and you cannot miss such a good opportunity to enrich your e-commerce strategy.
How Google Shopping works is not as complicated as you think it is. After having sent your product data to Google - using the Merchant Center tool - and created a campaign in your Google Ads account, Google will create ads around the web where potential customers can see your products.
You're not sure where to begin? This article will help you to better understand how the Google Shopping process works and how to get your Google Shopping campaigns up and running.
What is Google Shopping?
Google Shopping, we all know about it, but what is it exactly?
To make it simple, it's a comparison shopping engine offering the possibility to search for, compare, and shop all at the same place.
To display Google Shopping ads, Google is using product data uploaded by merchants via their Google Merchant Center account.
There are 2 kinds of ads:
- Google Ads: they only contain text and are simply based on keywords.
- Google Shopping Ads: also known as Product listing ads (PLA ads), these ads are meant for brands who are selling online. They are based on more kinds of information such as price or image and focus more on products and product categories rather than on keywords.
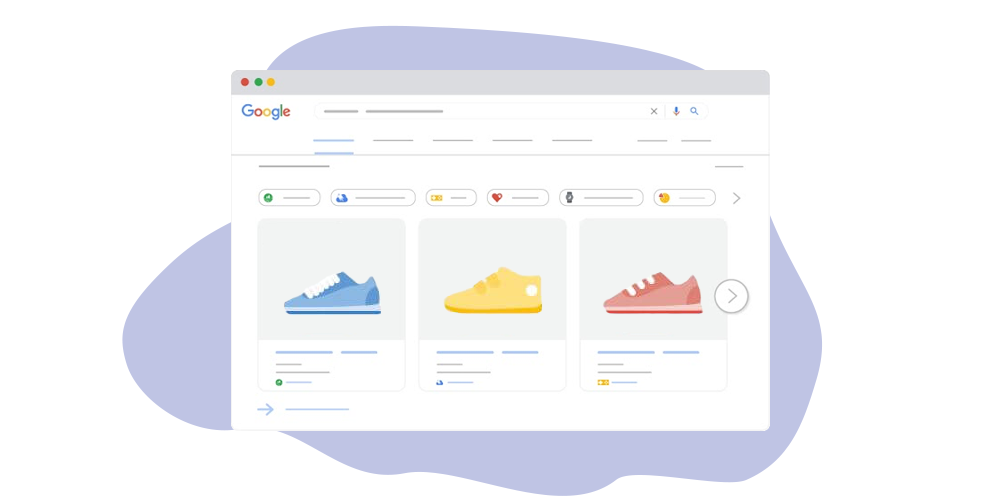
Below, you can see the two kinds of Ads.
 See, it can be difficult to attract qualified clicks through to your site using Text Ads as you are limited in the number of characters whereas Google Shopping Ads are more attractive and take the users straight to the item.
What are the advantages of Google Shopping for e-merchants?
 You may be already convinced, but wait to see what using Google Shopping Ads can bring you and your potential customers:
- Shoppers: they can enjoy a more friendly and visual user-experience to easily and rapidly find a large variety of products - maybe yours - based on their search query.
- Retailers: you could increase your conversion rate on your site with highly qualified traffic as shoppers are sent back to the retailer’s site when they click on a product link.
Hence, it is proven that Google Shopping has 30% higher conversion rates than text ads.
Moreover, with Google Shopping, you can be displayed several times in the results pages as:
- a website result
- a text-only result
- a Shopping result
This gives you, as a merchant, even more possibilities to increase your visibility and so your revenue.
How does it work?
Getting your products listed on Google Shopping can be very easy and fast.
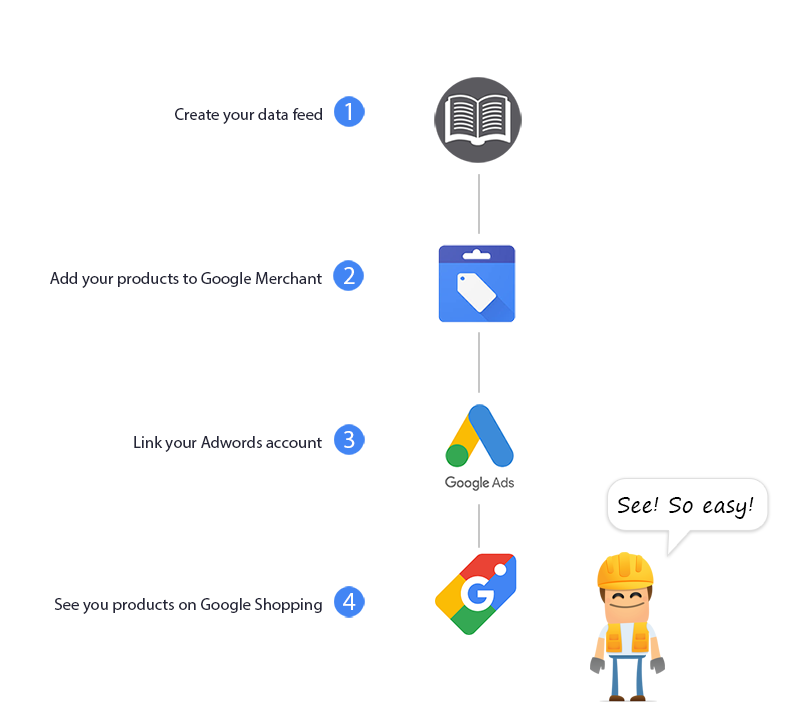 Find below how to proceed to manually set up your account.
Create your products data feed
Before you begin, you need to sign up for a Google Merchant Center account and claim your website’s URL. Google Merchant Center is a sort of back-office where you can send your data feeds and manage your account.
Sign up and learn more about Google Merchant Center.
To send your products to Google Shopping, you will have to create a data feed including your product information.
While creating your data feed, make sure to respect and meet Google’s Product data specifications.
Submit your data feed to Google Merchant
Once your Google Merchant Center account is created, you can upload your product data feed.

Check how to create your data feed from your Google Merchant Center account.
Link your Google Ads account
To get your products listed on Google Shopping, you will have to link your Google Ads account to your Merchant Center account as Shopping campaigns use the product data you submit in your Google Merchant Center.
 You’ll have to accept the request from your Google Ads account.
Manage your Shopping campaigns
Create your Shopping campaign
Once your Google Ads account is linked, you can create your campaigns directly from the Google Merchant account, or Google Ads.
You’ll have to define several settings for your Shopping campaign:
- A campaign name
- The country of sale for your campaign
- A maximum cost-per-click bid.
- A daily budget
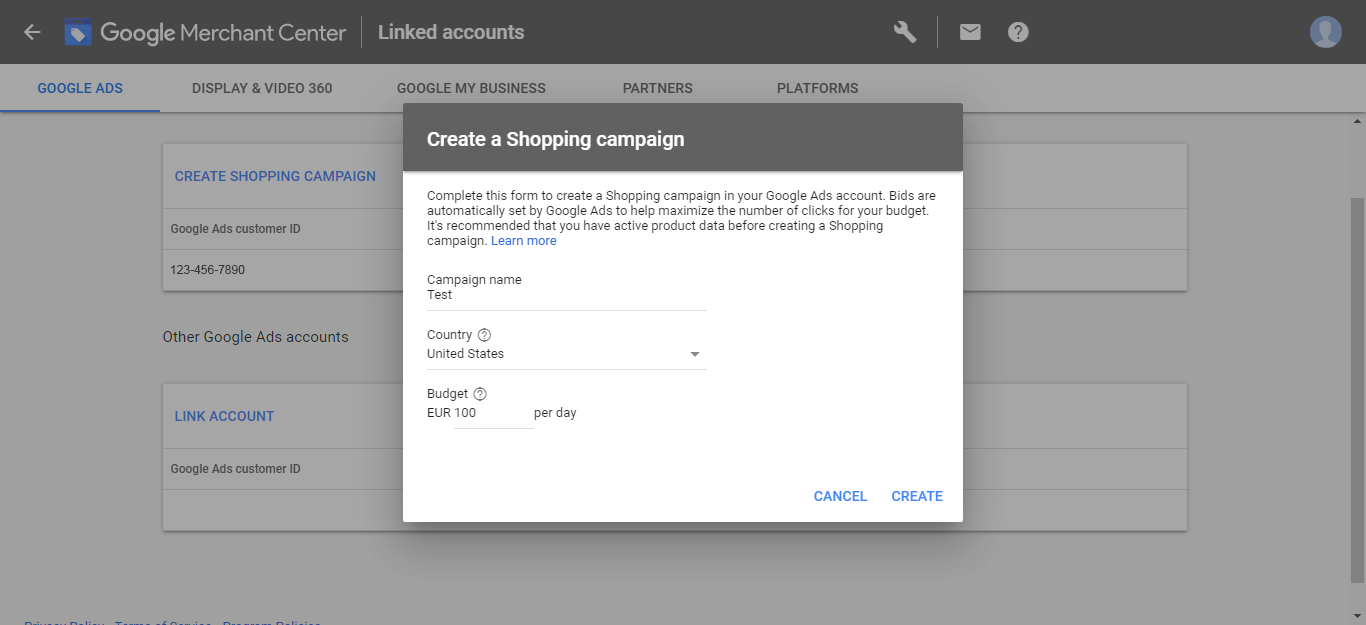 To define your bid strategy and configure your budget:
- See Google’s tips and best practices to help you choose your bids.
- Use the bid simulator from Google to estimate your advertising results over the previous seven days.
Create ad groups
You can create Ad groups to determine the type of ads you can show and how much you bid on those ads.
You can create two types of ad groups:
- Product Shopping ads: use your product data to show individual ads for each product
- Showcase Shopping ads: show multiple products within a single ad, and a product or lifestyle image that represents your brand or business.
Monitor your Shopping campaign
Once your Shopping campaigns are running, you need to make sure it is performing correctly. This step is very important so that your items are not disapproved by Google from your Shopping ads.
As your ads are generated based on the data you are sending in your Google Merchant Center account, you need to make sure these data are accurate and up to date.
Here are some of the best practices to monitor your Shopping campaigns:
- Enable automatic item updates
- Coordinate scheduled fetches with your website updates
- Provide product prices and availability more regularly
- Display only the final price on the product page
Have a look at this article to know more about how to optimize your Google Shopping campaigns.
How to add products on Google Shopping from your Magento store?
You are running a Magento store and you want to send your products to Google? Keep reading, our Simple Google Shopping module can help you to create your products data feed from your Magento back-office in one go.
Here is how users send their products to Google with our extension.
Step 1 - Make a few adjustments in the XML template
Once the extension is installed, the pre-configured template for Google Shopping can be easily edited to meet your catalog by:
- adding any data in the feed
- changing the currency
- changing the VAT rate
- making sure the template uses the right attributes (for example for the brand, the color…)
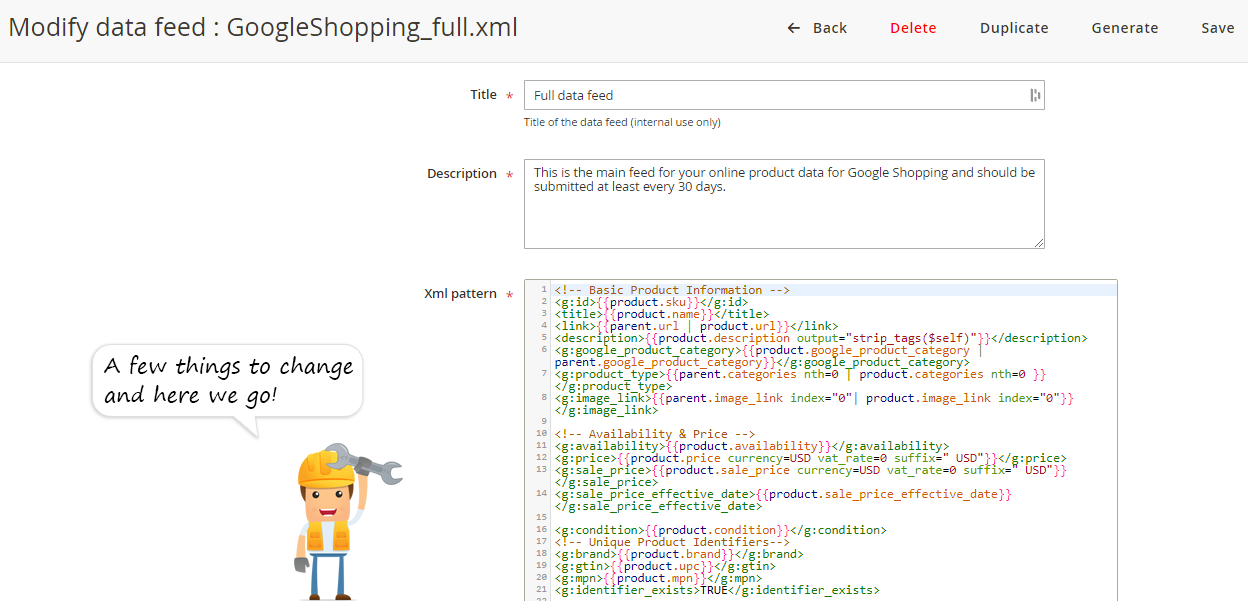 Check our documentation to see how you can configure the XML pattern.
Step 2 - Include the categories
Users choose the categories they want to include in the data feed and map them to Google ones.
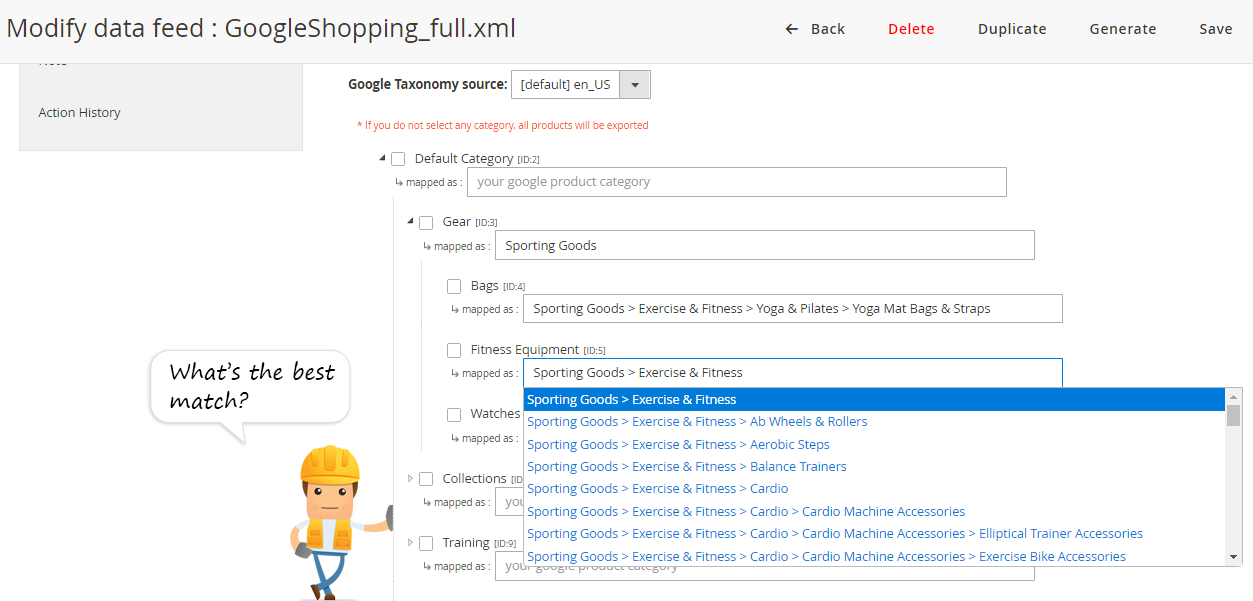 Check our documentation to see how to map your categories.
Step 3 - Filter out products from the data feed
It is also possible to filter the products of the data feed based on:
- the product type
- the attribute set
- the product visibility
- advanced filters
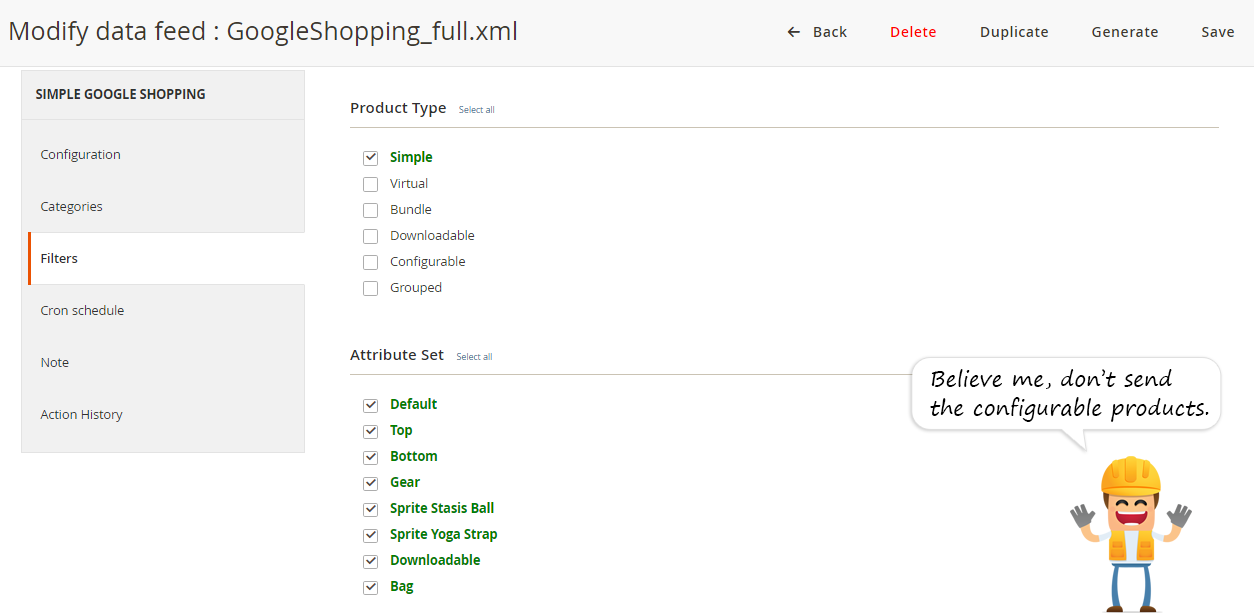 See how to use filters.
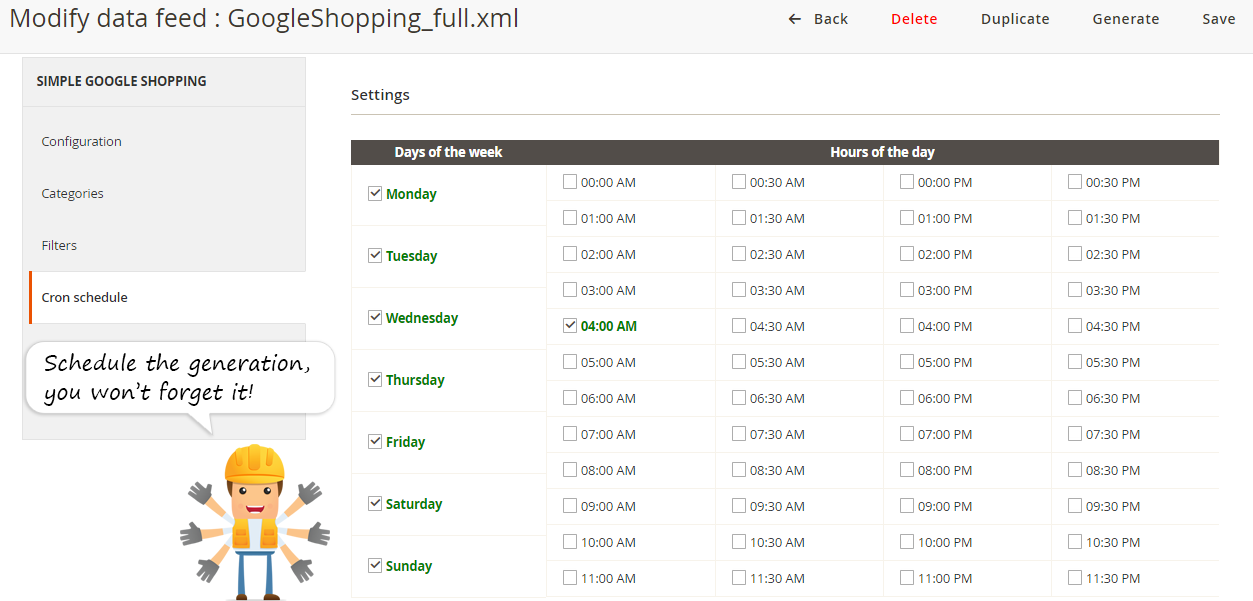
Step 4 - Define a schedule
So that their data feed can be automatically generated, users define a schedule for the cron task.
See how to configure the cron schedule.
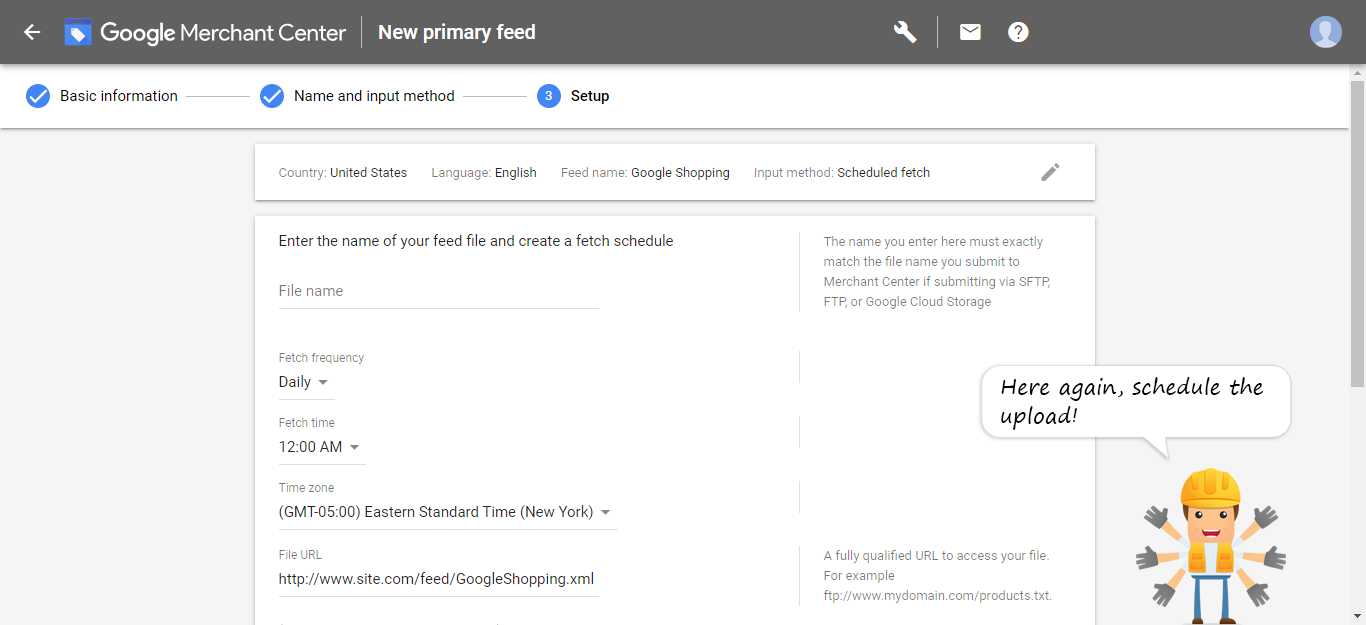
Step 5 - Upload the data feed to Google Merchant
After having generated the data feed from their Magento back-office, users copy and paste the URL while creating a feed from their Google Merchant center account and schedule a daily fetch.
Step 6 - Set the shipping and tax info
Users generally add shipping and tax information directly from their Google Merchant Center account.
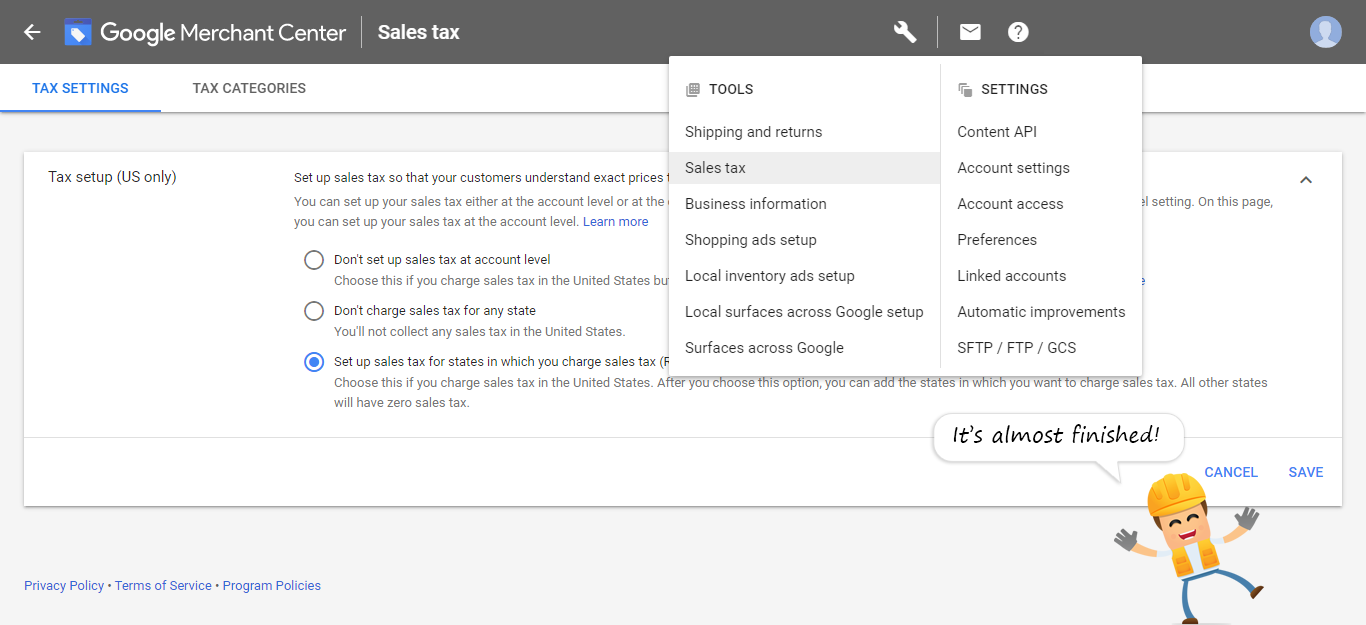 Check how to set up shipping settings and tax.
Step 7 - Wait for approval
Google may take a couple of days to review your items and check details against current shopping-ad rules and policies.
Once the data feed has been reviewed by Google, you’ll be able to download a report to check the errors and warnings that could prevent your products from being displayed on Google Shopping.
For more details about your item and feed issues, check the Diagnostic page.


